Power Up Google Shopping Ads In 5 Easy Steps
As most marketers know Google has a plethora of ad and marketing options ensuring whatever demographic your product or service requires Google can help you reach them.
Google Shopping ads have recently proven to be one of the fastest and most valuable ways to drive sales and increase leads with product-centric ads on search results.
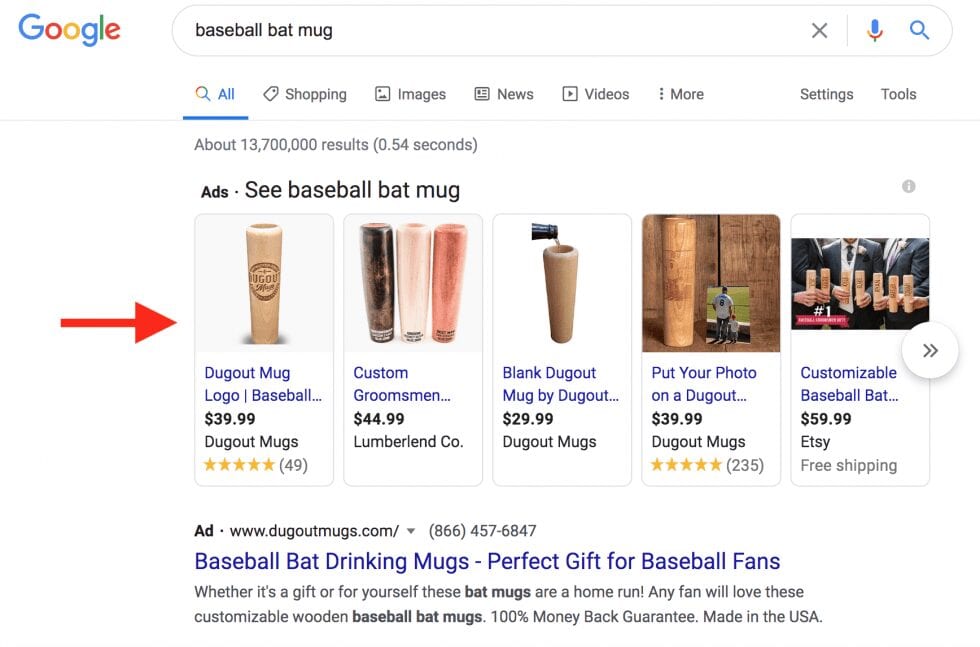
Google Shopping ads appear as visually appealing well-formatted search engine results that display the name, description, store, price and reviews.

Verify Your Product Information Is Correct
Creating Google Shopping ads is surprisingly easy, since it pulls the ads’ information directly from your website’s product pages. Make sure each product’s feed, like the title, price, URL and other metadata, are correct. Once Google Shopping ads is running your product you cannot make any changes so get it right the first time.
Now if your store is powered by Shopify, you can connect to an app called ShoppingFeeder. That handy little app allows you to adjust your product’s ad information without altering it on your site.

Connect to Google Merchant Center
First and foremost, sign up with Google Merchant Center. Verify and claim your website in order to connect it. When that’s done (takes a few minutes) set up your shipping details and tax information. You’ll notice that these fields are optional. Fill them out nonetheless because they make your product listings more trustworthy and builds consumer confidence.

Create a Product Feed on Google Merchant Center
To power up multiple products through Google Shopping ads, you’ll want to create a product feed. You can do this by selecting website crawl. This is powerful because it’ll automatically scan your site and upload all your products, fully categorized, right into your Google Merchant Center. Take a few minutes and go through your new listings and double-check for any Google missteps.

Link Your Google Ads and Merchant Center Accounts.
You’ll want to connect your two Google ad accounts. This makes tracking and analyzing your ad spend much easier. Google makes linking account super simple. Link your Google Merchant to your Google Ads account first. Log into your Google Ads account and approve the link request. Now you’ll be able to use your Google Ads account to create your Google Shopping ads and to track for desirable ROI.

Power Up Your Google Shopping Ads Campaign
Once logged in to your Google Ads account, find the All Campaigns section and click the blue plus sign to create a new campaign. Select your goal, if you have one. Now choose Shopping as the campaign type and select your linked Merchant account to power up all your products throughout the campaign. Remember to select your country where the items are being sold and the campaign subtype, which will be either Smart Shopping or Standard Shopping. More on those two options below.
Smart Shopping or Standard Shopping Campaigns
Smart Shopping gives you automated bidding and targeting and will display your product ads across the Google Search Network, Google Display Network, YouTube and Gmail.
Standard Shopping is less automated, but does grant you more control. With Standard Shopping you pick individual products, select bid strategy, determine budget and demographic targeting. It also allows you to exclude keywords and even customize your ads to different groups for specific purposes.
Set up your Google Shopping Ads Campaign
Name your campaign and select your preferred bidding, budget and targeting settings. Google will automatically choose the keywords you’re bidding on, but you do have the capability to remove specific keywords or phrases that you know don’t work for your products and potential customer base.
Once the campaign is running, you may want to split test different versions of these ad groups to see what settings convert best.
Never start split testing until you’ve allowed the campaign to run exactly as you initially set it up for at least two to three weeks. It always takes that long to get the truly valuable and actionable data in order to make a proper and beneficial decision.

Comparing Google Analytics To Google Tag Manager: Which Do You Need The Most & Why Google Tag Manager and Google Analytics are two separate but related services, and that can get confusing. Let’s break them down. In its simplest form, Google Analytics is the tracking tool, whereas Google Tag Manager is the mediator between your

79% of online carts are abandoned before even getting to the checkout process. We’ve put together 5 tips that can help you convert abandoned carts into sales that you can start implementing today. Keep Learning >


